scan a proof
sheet
After you print a proof sheet and fill it out, simply scan it to print chosen
photos from your photo card.
1
Load paper in the main tray, such as photo paper.
2
Make sure that the photo card is inserted in the appropriate slot on
your HP OfficeJet.
3
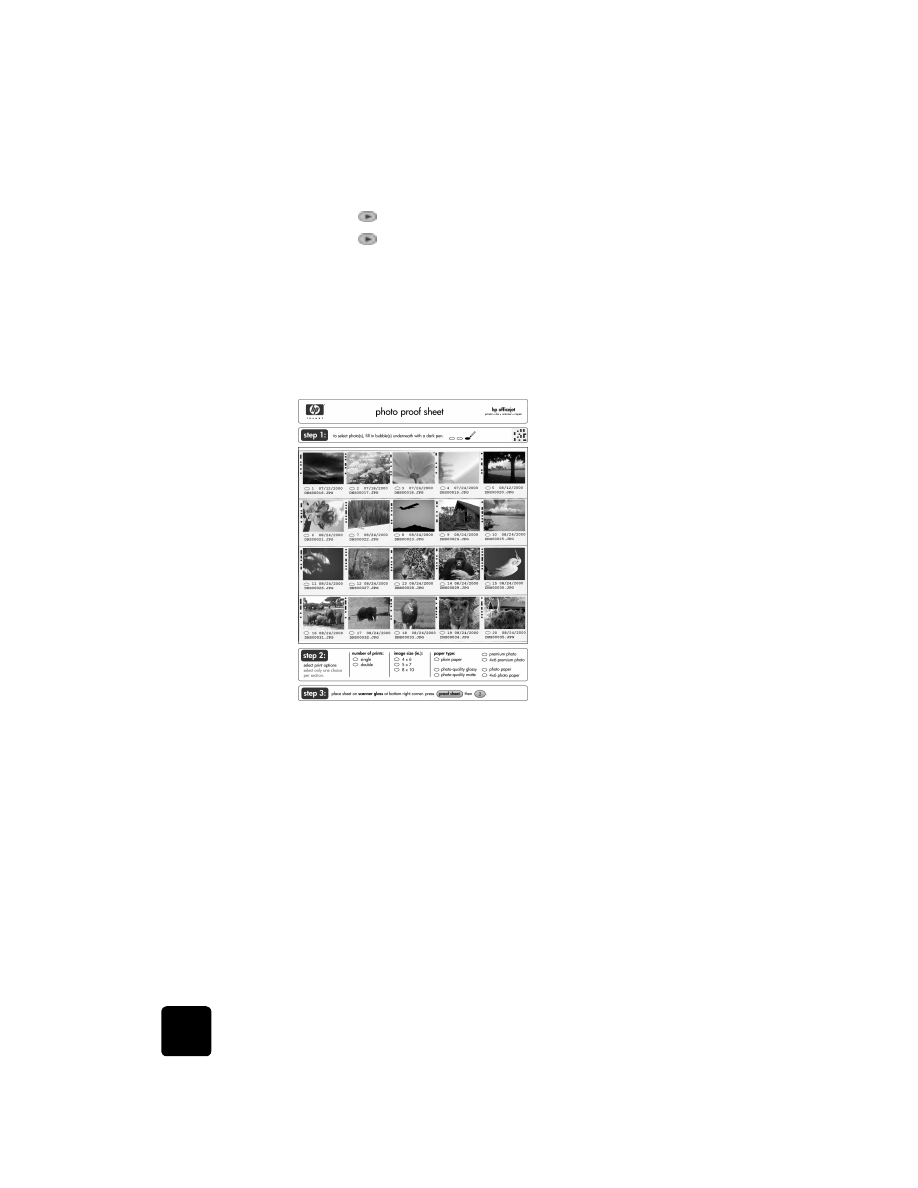
Fill out step 1 of the proof sheet, which lets you select the photos you
want to print by filling in the circles underneath the thumbnail images.
4
Fill out step 2 of the proof sheet, which lets you select the number of
prints and the image size for your photos. Also make sure you fill out
the same paper type that you have loaded in the main paper tray.
Tip! Select only one option in each section of the proof sheet.
step 1: Select the photos you want
by filling in the circles located
underneath each photo with a dark
pen.
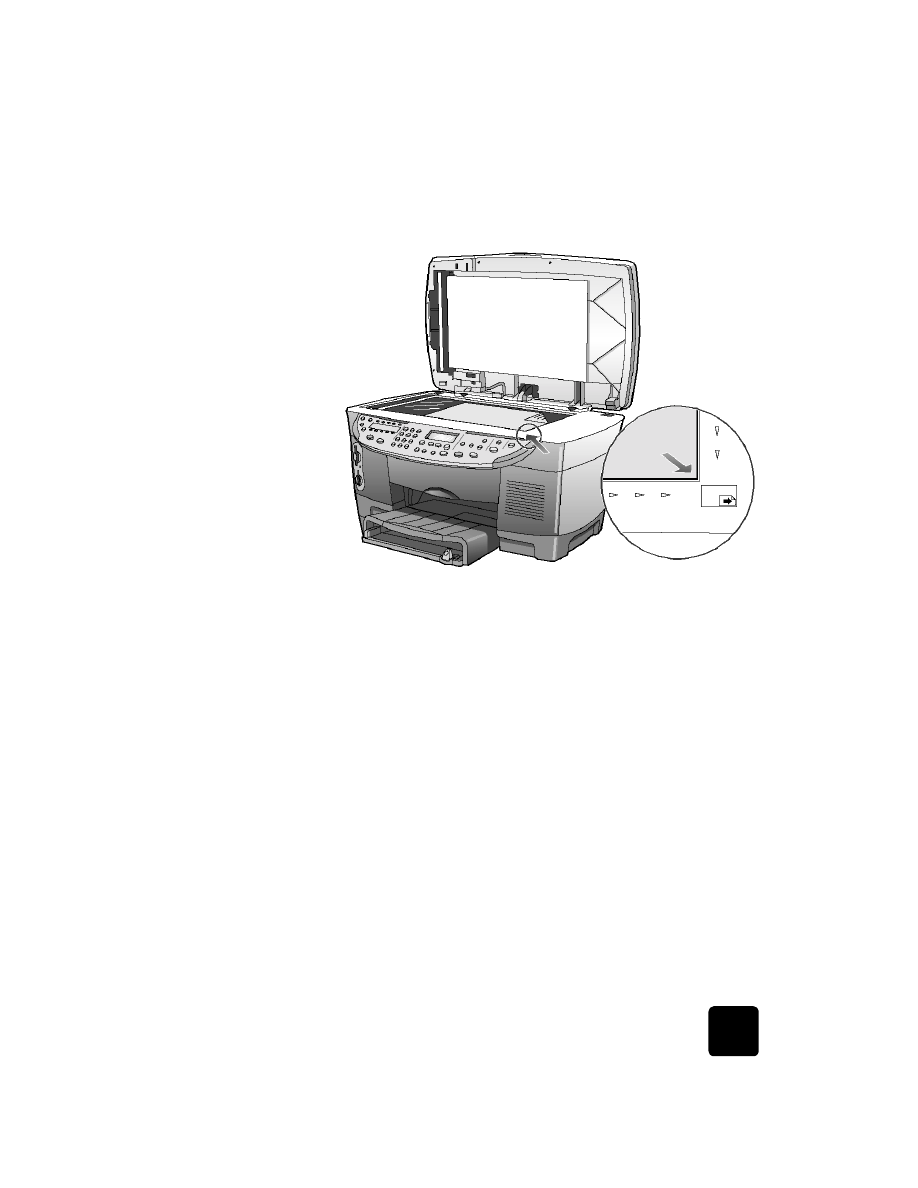
step 3: Place sheet on scanner at
bottom right corner. Press Menu,
0, 3.
step 2: Select the number of prints,
image size, and paper type.
learn more
43
hp officejet d series
5
Place the top of the proof sheet face down on the glass in the bottom-
right corner with the sides of the originals touching the right and
bottom edges.
6
Close the lid.
7
Press Menu.
8
Press 0, then press 3.
This selects Photo Card Functions, then selects Scan Proof Sheet.
The proof sheet is scanned and the HP OfficeJet prints the photos you
specified on the proof sheet from the paper in the upper tray.